Mid campaign crescendo - the Lost Mine of Phandelver
The titular dungeon is cleared, Rockseekers rejoice!

The race is on
The party is under a bit of a time crunch - if you want to know why, please read the last session notes, which set up the race against the Black Spider to find the Forge of Spells. As they enter the dungeon, the party has four goals, two from Gundren, and two from Sildar:
- Find Gundren's brothers
- Reclaim the Lost Mine of Phandelver for the Rockseekers (and a 10% royalty on profits thereafter!)
- Find the Forge of Spells and see if it can be used to defend Phandalin
- Defeat the Black Spider
The party clears the rubble of the cave in to the north hoping it is the less obvious path and then navigates the small, winding mining tunnels. A prior, harrowing, experience with ochre jelly sees them scanning the ceiling as they progress forward, and sure enough they come upon one, albeit just its remains. The partially dissolved body of a bugbear and multiple sets of footprints tell them that the Black Spider's forces had also come this way (area 2 in the map below), and so they head deeper into the caverns down the western side.
In the gloomy darkness of Wave Echo Cave, near a dark and ominous still pool of water, light sources are spotted (area 10). Black clad figures guard some stairs leading to a more structured part of the mine, and these human Zhentarim carry torches. The party quickly dims their own lantern and goes into stealth mode, ready to strike. Wick uses minor illusion to create a sound from the centre of the pool, and the hapless guard turns his back on an all too willing Alucard, who stabs him in the back.
This kicks off an incredible running battle, as the remaining Zhentarim alert their bugbear allies in the nearby barracks (area 11). And when things go south for this larger combined force, one of the bugbears alerts the forces working for Halia Thornton deeper in the cavern (area 18). Systematically the party chases down every enemy and slays them, with Halia returning to her true doppelganger form and fleeing into the Temple of Dumathoin (area 19), where Nezznar, the Black Spider, is waiting for them.
 | |
|
Beating the Black Spider
 |
| The Temple of Dumathoin was the Black Spider's base of operations Image by AciferBG |
After dispatching the last Zhentarim and bugbear guards, the party moves into a large hall with a high roof, six cracked pillars, and a nine foot tall dwarven statue with emerald eyes looking down on an altar and mighty stone warhammer. There the fleeing doppelganger makes a stand with its master, the Zhentarim spymaster that had been dogging Gundren's and the party's steps since the very first adventure. Nezznar, the Black Spider, has no time to negotiate, since the Hammer of the Lord's Alliance are not in the mood to parley...
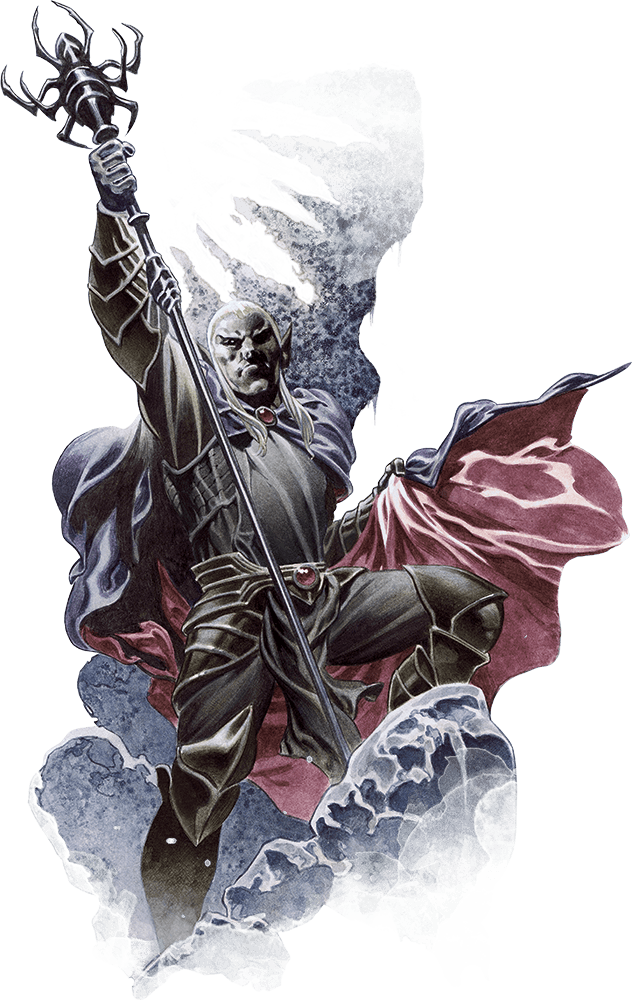 |
| The Black Spider, Nezznar, was finally standing before the party Image by Wizards of the Coast |
From the shadows behind the pillars, three giant spiders ambush the party as they surge forward, stopping some of them in their tracks with their sinewy strands. The Black Spider, true to his name, uses his staff to also web the exit and spider climbs the walls, and the doppelganger, out of tricks, resorts to melee.
Nezznar's hiding space is not safe, however, as Wiggity also climbs the walls in giant spider form, pressing the spellcaster while Terach and Alucard deal with the ground forces. But Nezznar is knocked off his perch by Wick's eldritch blast, and relieved of his Spider Staff by Wiggity's heat metal spell in an amazing display of ingenuity. With nowhere to turn, Nezznar flees through the southern door, but not before using magic missile to topple the already damaged pillars in the temple, causing the ceiling to collapse!
Pursued by the party, Wiggity's honey badger and with their goblin companion Droop circling around from behind, Nezznar tries to talk his way out of the tight spot. But the raging Terach is in no mood for small talk and cuts down the hapless wizard, triggering the blessing of Lloth (the drow spider god) and the transformation of the Black Spider into a monstrous drow/spider hybrid.
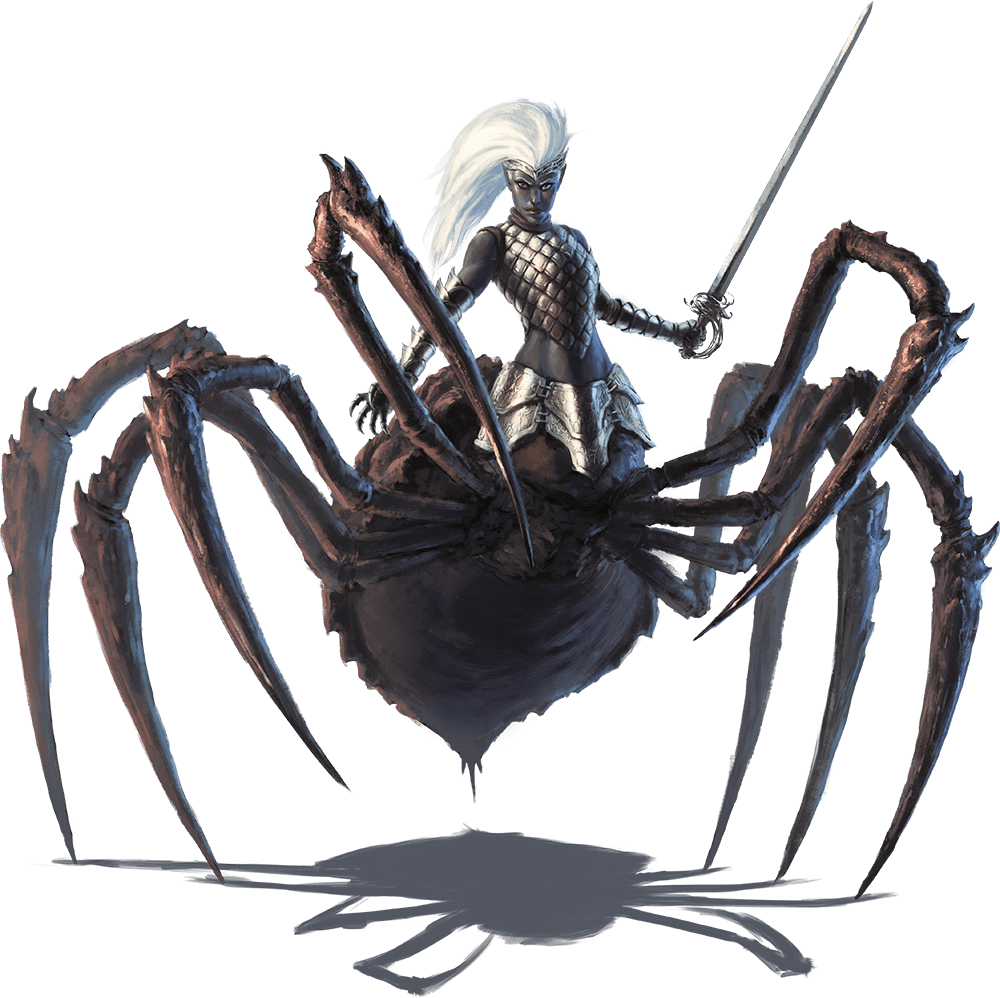 |
| The party find out why the drow was shunned by his society, he is a drider! Image by Wizards of the Coast |
Surrounded on all sides, Nezznar's chitinous hide proves tough to penetrate for the party. But the twin blades of both Terach and Alucard, the blasts of Wick, and the tenacious bite of the badger prove too much for the drider. Droop, sensing the drider is in its death throes, courageously flanks from the other side and tries to prevent its escape with his scimitar. It was then that the party sidekick, desperately trying to prove his worth, meets his ultimate fate. The drider ruthlessly plunges its razor sharp leg into the goblin, piercing deep into his vitals and killing him outright. Nezznar is defeated, but not without cost. Rest in peace Droop the Goblin of the Cragmaw tribe, you will be missed, especially by your big brother Alucard.
With the Black Spider and his minions defeated, the party finds his treasure, a map showing the (lack of ) progress made by his forces, and Tharden, the bound and gagged brother of Gundren Rockseeker (in area 20). Feeling depleted, the party returns to the entrance of the cave where Gundren and the others have made camp, and take a long rest while the Rockseekers are reunited.
Flameskull fun
With two of the original goals achieved, and the threat of their adversary finding the Forge of Spells first now over, the party turns to face whatever undead forces had stymied the Black Spider's progress. To the chagrin of Wiggity the druid, the rest of the party are not brave enough to head through the cavern full of fungi (area 8). The shriveled corpses of three black clad warriors, their bodies writhing in agony at time of death, might have had something to do with that decision.
 |
| Blocked from the eastern path by poisonous flora, the party heads up the middle Image by Wizards of the Coast |
The great cavern in the central area (area 9) really illustrates the extent of the battle for the Lost Mine of Phandelver, centuries ago. Once a banquet hall for the miners, the rough floor is littered with dozens of skeletons of orcs, dwarves, humans and gnomes as the party arrives. When some of the corpses animate into ghouls the party flees makes a tactical retreat up the eastern stairs, and Wiggity has another revelation. The druid's spike growth spell, combined with the relentless stupidity of the ghouls, creates a cheese grater effect as they struggle through the difficult terrain, whatever is left of their flesh being stripped by the dense and thorny foliage. Through the encounter, the party notices that one of the ghouls observes them with glowing yellow eyes, and is able to hurl a sickening green ray at their elevated position. When that ghoul falls, the eyes appear on another, repeating until they all fall, but the feeling of of being watched by a malevolent force lingers even after they head north out of the cavern.
As Alucard scouts ahead in the shadows, a dim, green light emanates from the north, casting flickering shadows over a great forge and bellows created by the dwarves of long ago. If the party had consulted the map recovered by Nezznar, they would have been forewarned of the "immensely powerful undead, capable of fiery death" in the smelter room. Entering cautiously and stepping through the skeletons of even more casualties from the ancient battle, the party see a bright streak flashing toward them, blossoming with a low roar into an explosion of flame!
 |
| Hi, I'm a flameskull, and I toss fireballs and flaming spheres for funsies Image by Wizards of the Coast |
A flameskull guards this area, and after going straight to shock and awe with a fireball, it directs its zombie minions rise up to attack the party, some of whom are still putting out the flames. This proves a challenging combat for our heroes, as the tiny flying skull hides in the mechanisms of the forge, directing a flaming sphere around the battlefield and hurling magic missiles with abandon. As with prior battles, Wick's healing word is clutch to keep the party going, and Wiggity's favoured bear form tanks the slams of the zombies. The party is once again watched by the glowing yellow eyes, moving from zombie to zombie as they fall, but not before directing necromantic powers that are well outside the normal capabilities of the shambling corpses.
Wick, deadly from range or up close, chooses the former to pop out from behind the forge and direct his guiding bolt with stunning accuracy, critically hitting the flameskull and bringing it down to the floor. The relieved party heads into the barracks to the west, and as they pass the tiny skull, Alucard reaches deep into his memory of arcane dabbling and senses that the flameskull could yet be a problem. Without means to finally destroy the pernicious undead, the party resolves to flush it out of the caverns to the north in the small, yet swift, stream flowing through (area 17).
The Forge of Spells
With the smelter now cleared, the party is free to scout the many entrances into the final unexplored area of the cave. The ever-present, intermittent sound of waves that gives the cave its name growing louder, the party comes to understand its source - the water from the stream opens into a large pool, where the pressure of the seething waters routinely builds and causes a wave to crash against the ledge upon which they stand (area 16).
Knowing the eastern part of the cave to be guarded by patrolling spectral forms, the party creeps carefully through the northern stairs, into a natural cavern with glittering minerals on the ceiling making it look like stars in the night sky. The ancient battle was fiercest here, and as they head to a human-sized, man-made building, their powers of stealth fail them and hateful spectres converge upon their position. The party does what they do best, and with their arsenal of magic weapons bestowed to them by the Lord's Alliance, are able to defeat the undead guardians, including one final ghoul with glowing yellow eyes...
 |
| A badly damaged workshop houses a powerful, yet faded, magic - the Forge of Spells |
The doors to the workshop have been blasted by powerful magics, their hinges melted, causing the doors to be barred. But Wick, having spent time with the woodcarver's widow, has come to understand the power of mending, both for restoring materials, and hearts. The cantrip proves incredibly useful as the hinges are restored and the party are free to enter what can only be... the Forge of Spells (area 15).
 |
| Hello, what do you mean restore the mine to former glory? Can.. not.. compute.. must.. attack! Image by Wizards of the Coast |
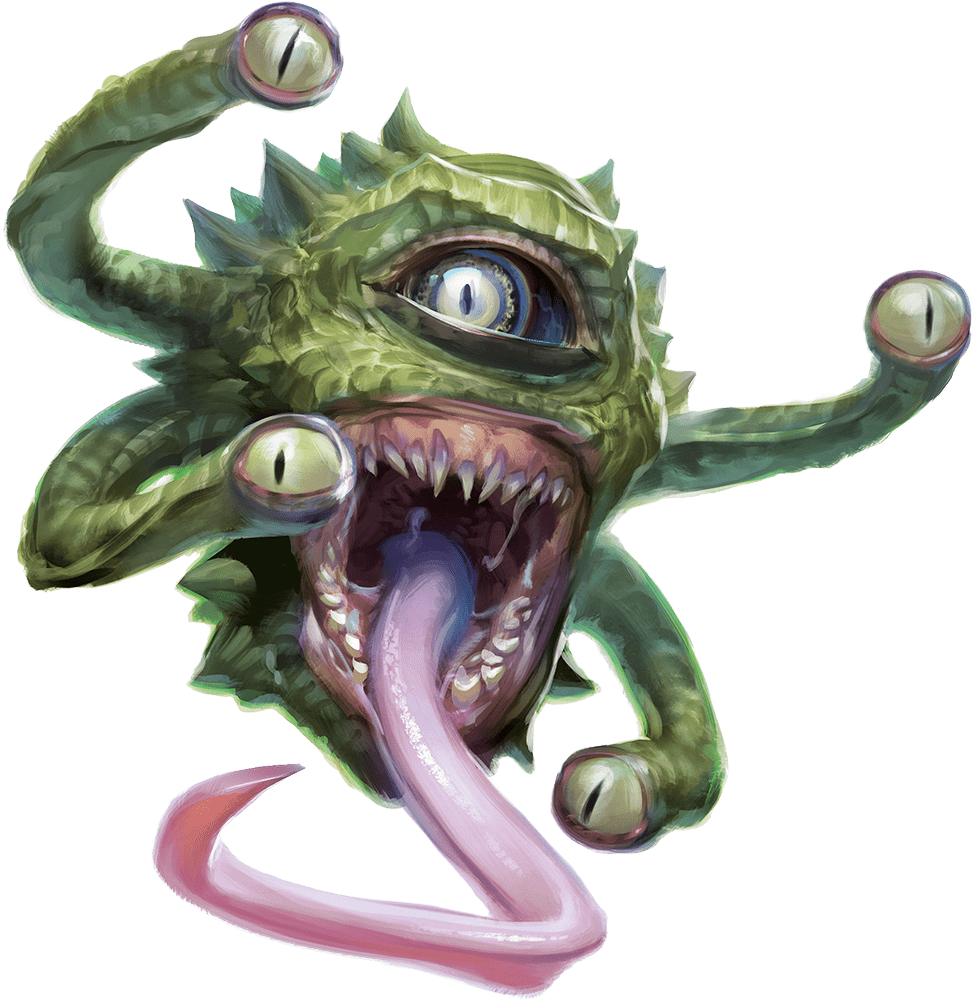
A terrifying, but confused, aberration is guarding the forge, and after fumbling attempts to converse with it, the Spectator attacks the party. It animates the only weapons and armour left intact in the debris, using a glowing mace called Lightbringer to attack Terach, and a bright breastplate with a golden dragon motif called Dragonguard to fend off Wiggity's pet badger's attacks. While the magical gaze of the Spectator manages to paralyze Alucard, it falls under Terach's magical longsword Talon, the ferocious bite of Wiggity in dire wolf form, and the bolts and blasts of Wick, finally released of its duty.
Mormesk's lament
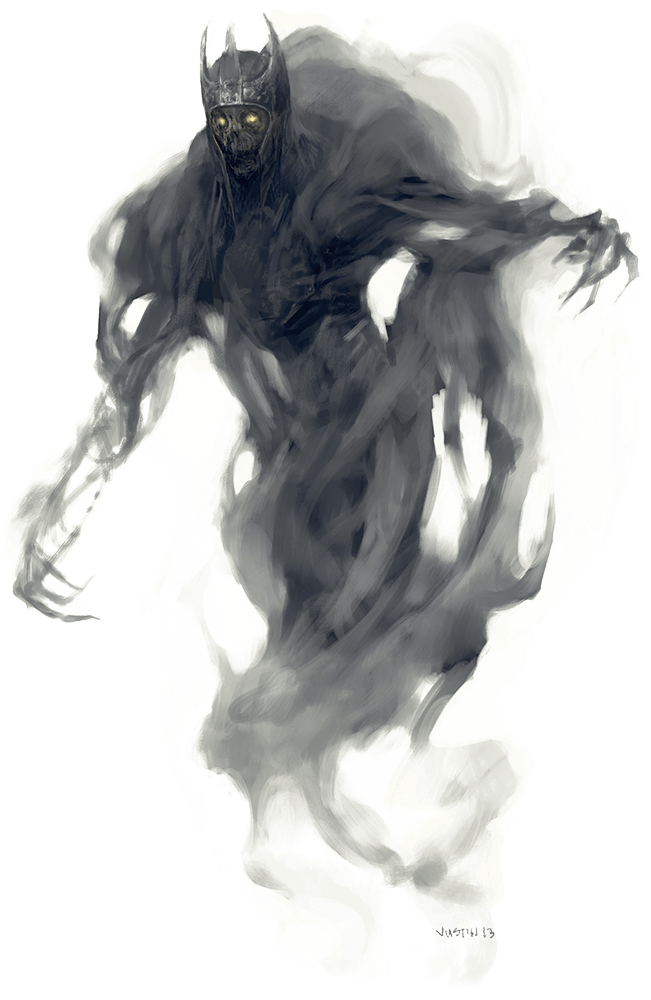 |
| Mormesk, the last surviving wizard, has become twisted and evil, and a total hoarder Image by Wizards of the Coast |
 |
| Like any true completionists, our heroes clear the full map, making the Lost Mine safe for the dwarves Image by Wizards of the Coast |
What's next?
Wave Echo Cave has been cleared, the Lost Mine of Phandelver and the Forge of Spells reclaimed, and the Black Spider has been defeated! That's where we leave our heroes, having made their way back to the entrance to deliver the good news to the dwarves. While satisfaction comes over them for a job well done, their thoughts quickly turn to Phandalin, their adopted home, where they know a storm is coming. A dragon, half-orc shamans of Talos, and hordes of Many Arrows orcs have their hearts set on war in the region, and the town is unlikely prepared enough for that scale of confrontation.
Can the heroes use the power of the Forge of Spells to defend the town? Will the considerable magical armoury they have built up be powerful enough to defend the townsfolk? And most importantly, what will they spend the 10% cut of the profits from the mine on?
Find out next time when we resume the second half of the campaign, in Frontier Forays, featuring Phandalin's Finest, the Hammer of the Lord's Alliance, Friends to Goblins, Fellers of Flowers, Surfers of Sharks, Nemesis of Nezznar, and Liberators of Lost Mines!
Comments
Post a Comment